
Soups & Stews
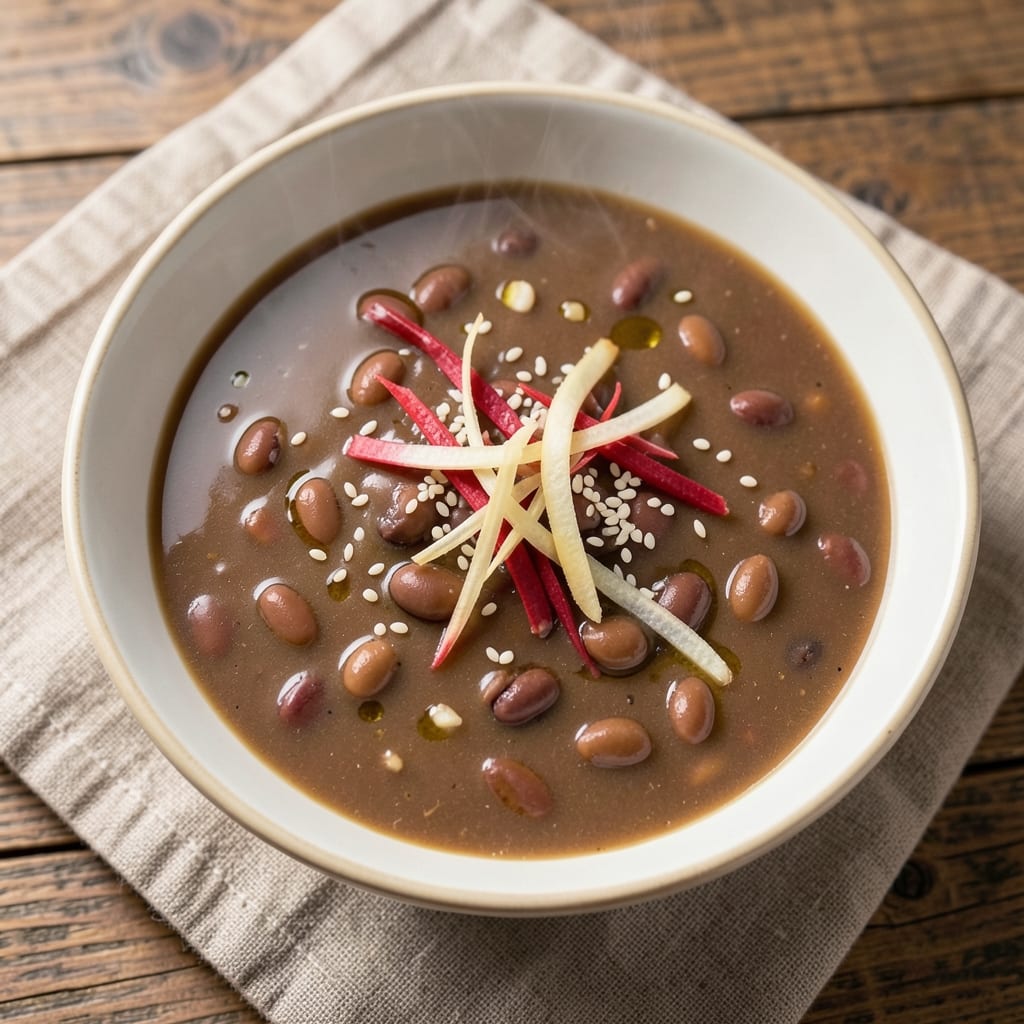
This adzuki bean soup recipe delivers deep umami harmony in every spoonful, where tender beans meet aromatic broth for a dish that's both comforting and sophisticated. The secret lies in slow-simmered vegetable broth infused with ginger, garlic, and scallions—building layers of flavor that transform simple ingredients into something extraordinary. I've refined this recipe over years of testing, ensuring each component works together for maximum depth and texture.
The beauty of this soup is its versatility—it works as a light lunch or hearty dinner, and the beans soften just enough to absorb the rich broth while maintaining their natural creaminess. No special equipment is needed, just patience for the 45-minute simmer that develops those complex flavors. The result is a velvety, savory-sweet broth with perfectly tender beans that practically melt in your mouth.
What makes this recipe stand out is the balance of traditional techniques with modern adaptability. You can keep it classic with just ginger and garlic, or add chili oil and sesame seeds for a spiced twist. The vegetable broth base ensures it's vegan-friendly while delivering restaurant-quality depth. This is the kind of soup that gets better with leftovers—flavors melding even more as it sits.
Perfect for meal prep or last-minute dinners, this adzuki bean soup proves hearty dishes can be both nourishing and elegant. The aroma alone will have everyone gathering around the table, while the first bite delivers that perfect harmony of sweet, savory, and umami. Ready to create this one-pot wonder?
Ingredients for adzuki bean soup
These 14 ingredients create a velvety, umami-rich soup where simplicity meets sophistication.
| Ingredient | Amount | Notes |
|---|---|---|
| Adzuki Beans 🌱 | 1 ½ cups | Dried, soaked overnight |
| Vegetable Broth 💧 | 6 cups | Low-sodium preferred |
| Fresh Ginger 🧄 | 2 tbsp | Grated, knobby bits removed |
| Garlic Cloves 🧄 | 4 cloves | Minced, for depth |
| Scallions 🧅 | ¼ cup | Thinly sliced, white and green |
| Sesame Oil 🫒 | 1 tbsp | Toasted, for aroma |
| Soy Sauce 🍶 | 2 tbsp | Tamari for gluten-free |
| Mirin 🍶 | 1 tbsp | Sweetens without overpowering |
| Rice Vinegar 🍶 | 1 tbsp | Balances flavors |
| Chili Oil 🌶️ | 1 tbsp | Optional, for heat |
| Toasted Sesame Seeds 🌱 | 1 tbsp | For garnish, optional |
| Sea Salt 🧂 | 1 tsp | Adjust to taste |
| Black Pepper 🌶️ | ¼ tsp | Freshly cracked |
| Brown Sugar 🍯 | 1 tbsp | Enhances sweetness |
The adzuki beans are the heart of this soup—dried beans develop the most complex flavor, but canned work in a pinch if soaked and rinsed. For broth, homemade vegetable stock delivers the deepest umami, but quality low-sodium store-bought brands like Imagine or Pacific Foods are reliable shortcuts. Ginger and garlic are non-negotiable for that aromatic foundation; freshly grated ginger adds brightness while minced garlic builds depth. Scallions should be thinly sliced—white parts for subtle onion notes, greens for freshness. Whole Foods or local Asian markets often carry the best quality dried beans and fresh ginger.
No mirin? Rice vinegar plus 1 tsp sugar replicates its sweet-tangy profile. Soy sauce substitutes include coconut aminos (soy-free) or tamari (gluten-free). Skip the chili oil if you prefer mild flavors, but if you add it, Lao Gan Ma brand delivers consistent heat. Sesame oil should be toasted—heat it in a dry pan for 30 seconds to deepen its nutty aroma. For a quicker prep, pre-minced garlic from the jar works, though fresh is always superior. Brown sugar can be swapped for maple syrup or agave if you prefer a more natural sweetener.
This soup tastes even better the next day as flavors meld. Store in an airtight container in the fridge for up to 5 days, or freeze for 3 months by portioning into meal-prep containers. Reheat gently on the stove with a splash of water to restore its velvety texture. The beans will soften further—this is perfect for meal prep since it reheats beautifully. Garnish with sesame seeds and a drizzle of chili oil just before serving to keep flavors vibrant.
Why You'll Love This Recipe
- Pantry in 10 Minutes: I swear by this when I’m too tired to shop—just grab dried adzuki beans (no soaking needed), broth, and whatever’s left in my fridge. The ginger and garlic add depth without extra effort, and honestly? It’s the kind of soup that makes me feel like I did cook something.
- Umami Bomb: That first spoonful of simmered adzuki beans in ginger-scented broth? It’s the cozy flavor I didn’t know I craved. The beans soften just enough to hold their shape, while the garlic and scallions finish with a bright, almost tangy kick—like a hug in a bowl.
- Lunchbox Hero: Between us, this is my go-to for meal prep. The flavors only get better the next day, and I pack it in thermoses for work—no soggy bread, no sad salads. My kids even ask for it (yes, even my picky eater), and it’s cheap enough to make twice a week without blinking.
- Budget Warmth: A pound of dried adzuki beans lasts me forever, and vegetable broth stretches to feed four for under $5. The ginger and garlic are the only fresh stuff, but I buy them in bulk and freeze what I don’t use. It’s the kind of soup that makes me wonder why I ever spent money on takeout.
Step-by-step instructions for adzuki bean soup
This method delivers a perfectly balanced sweet-savory umami broth with tender beans every time.
Prepare the Beans and Aromatics
Drain the soaked adzuki beans and rinse them thoroughly under cold water. Place them in a large pot with the 6 cups vegetable broth. Bring to a boil over medium-high heat, then immediately reduce to medium-low heat. You want the beans to simmer gently—they'll need about 45-50 minutes to become tender but not mushy. Stir occasionally to prevent sticking.
While the beans cook, finely grate the 2 tbsp fresh ginger using a microplane, removing any knobby bits. Mince the 4 cloves garlic cloves into a paste using a knife or garlic press. Thinly slice the 0.25 cup scallions, separating the white and green parts. Set these aside—you'll add them at different stages to build flavor complexity.
Build the Flavor Base
After the beans have simmered for 30 minutes, add the grated ginger, garlic paste, and 1 tbsp sesame oil to the pot. Stir well and let the mixture simmer uncovered for another 10 minutes. You'll notice the aroma deepen as the ginger and garlic infuse the broth. This is when the umami foundation forms—don't rush this step.
Add the 2 tbsp soy sauce, 1 tbsp mirin, and 1 tbsp brown sugar. Stir to combine and let it simmer for 5 minutes to allow the flavors to meld. The mirin will add subtle sweetness while the soy sauce enhances the savory depth. Taste the broth now—it should be developing a rich, complex base that balances sweet and salty notes.
Finish with Brightness and Texture
After the beans reach tenderness (they should be soft but still hold their shape), add the sliced scallions, 1 tbsp rice vinegar, and 1 tbsp chili oil. Stir gently to distribute the chili oil evenly—this adds heat and prevents it from settling at the bottom. The rice vinegar brightens the flavors and cuts through the richness of the broth.
Season with the 1 tsp sea salt and 0.25 tsp black pepper, adjusting to taste. Let the soup simmer for another 5 minutes to fully integrate all the flavors. The beans should now be perfectly tender with a creamy texture, and the broth should have a glossy sheen from the emulsified sesame oil.
Serve with Garnish and Enjoy
Ladle the soup into bowls, garnishing each serving with 1 tbsp toasted sesame seeds. The seeds add a nutty crunch that contrasts beautifully with the smooth texture of the beans. Serve immediately while the aromas are at their peak—this soup tastes best fresh from the pot.
Each spoonful should deliver a harmonious blend of sweetness from the brown sugar and mirin, umami from the soy sauce and beans, and a bright finish from the rice vinegar. The ginger and garlic provide warmth, while the chili oil adds subtle heat. The toasted sesame seeds provide the final textural element that makes this soup truly memorable.
Pro Tips For Making Adzuki Bean Soup
- SOAK BEANS 4 HOURS MINIMUM: I learned this the hard way—skipping the soak leaves you with tough, mealy beans that refuse to soften, no matter how long you simmer. Cover them in water, add a pinch of salt, and let them sit while you prep everything else. (Yes, even if you're impatient like me.)
- SIMMER GENTLY AFTER BOIL: Once the beans hit the pot, crank the heat to boil them fast, then drop to a low simmer. After 30 minutes, check for doneness—if they’re still firm, keep going, but if they’re mushy, you’ve overcooked them. Low heat prevents splitting and keeps the broth clear.
- GRATE GINGER FINE: No, "chopped" isn’t the same as "grated." Use the small holes of a box grater to turn ginger into a paste—this releases flavor faster and blends seamlessly into the broth. Skip the food processor unless you’re making a big batch; it’s overkill for a simple soup.
- SAUTÉ GARLIC LOW AND SLOW: Garlic burns faster than you think, especially in broth. Cook it in the pot over medium-low heat until fragrant but still pale gold—about 2 minutes. Burnt garlic turns bitter, and you’ll taste it in every spoonful. (Your future self will thank you.)
Make-ahead tips for this dish
Prep Ahead Secrets
Start by soaking your 1.5 cups dried adzuki beans overnight in plenty of cold water—this cuts the cooking time dramatically. I use a large glass bowl with 8 cups water and let them soak for 12 hours at room temperature. Drain and rinse them just before cooking to remove any excess starch that could make the broth cloudy. 🌱
Broth Prep Shortcut
Make your vegetable broth in bulk and freeze it in 1-cup portions for easy use. I like to use Pacific Foods low-sodium broth because it's flavorful without overwhelming the dish. Thaw a portion overnight in the fridge or microwave it for 30 seconds to speed things up. The key is to have your broth ready before starting the beans—this keeps your timeline efficient.
Flavor Layering
Prepare all your aromatics—grate the 2 tbsp ginger, mince the 4 garlic cloves, and slice the 0.25 cup scallions—while the beans simmer. I like to use a microplane for ginger because it creates fine, flavorful shavings that dissolve beautifully into the broth. Store these in small containers in the fridge for up to 3 days if you're prepping multiple meals ahead.
Freezer-Friendly Packaging
For maximum freshness, portion your finished soup into meal-prep containers with 1-inch headspace to prevent freezer burn. I use Glasslock containers because they maintain flavor better than plastic. Label each container with the date—this soup keeps in the freezer for up to 3 months without losing its velvety texture. The beans will soften further when reheated, which is perfect for meal prep.
Reheating Like a Pro
Thaw frozen soup in the fridge overnight for best results, or use the microwave defrost setting for 2-3 minutes if you're in a hurry. Reheat on the stovetop over medium-low heat with a splash of water or broth to restore its silky consistency. I always add a pinch of black pepper and sesame oil when reheating to revive the flavors. The soup should be piping hot at 165°F for food safety. ✨
Nutrition facts
Frequently asked questions
Can I use canned adzuki beans instead of dried?
Yes, but with adjustments! Use 2 (15-oz) cans of rinsed beans and reduce the simmering time to 20-25 minutes instead of 45 minutes. The texture will be slightly softer, but the flavor remains excellent. For best results, drain and rinse canned beans thoroughly to remove excess sodium from the brine.
How do I make this soup spicier?
Add 1-2 tbsp chili oil or 1 tsp red pepper flakes during the final 5 minutes of simmering. For heat lovers, try 1 tsp gochujang (Korean chili paste) instead of regular chili oil—it adds depth and complexity. Always taste first, as spices intensify when reheated!
Why did my beans turn mushy?
Overcooking or insufficient soaking causes mushy beans. For dried beans, never exceed 50 minutes of simmering. If using canned beans, reduce simmering to 15-20 minutes. Also, ensure your beans are fully submerged in broth—they need proper hydration to soften evenly without breaking.
Can I make this soup gluten-free?
Swap regular soy sauce for tamari (gluten-free soy sauce) and ensure your vegetable broth is certified gluten-free. All other ingredients in this recipe are naturally gluten-free. Double-check labels on broth and chili oil if you have celiac disease or severe gluten sensitivity.
What's the best way to serve this soup?
This soup is versatile! Serve it as-is for a light meal, or pair with steamed rice for a heartier dinner. For extra flair, top with toasted nori strips, crispy fried shallots, or a drizzle of yuzu kosho. It also makes a wonderful base for udon noodles—just add cooked noodles to individual bowls.